 Sumas Window
 Nooksack and Sumas Sit at the Hard-Weather End of Whatcom County
Homes in Nooksack and Sumas take a different kind of beating than houses twenty miles south in Bellingham. This corner of Whatcom County sits where the Nooksack River valley opens into flat farmland right up against the Canadian border, and that geography matters more than most homeowners realize. Moist, salt-tinged Pacific air pushes inland off the Sound and gets funneled and wrung out along the valley, dumping driving rain against the west and south walls of every house in its path. In winter, the pattern flips: cold, dry air masses build up over the Fraser Valley in British Columbia and spill south through the Sumas Gap as outflow wind, sometimes dropping temperatures fast and hard right behind a soaking system. That one-two punch — saturate, then freeze — is rough on any exterior, and it's rougher on siding that wasn't installed to shed water the way this climate demands.
Add in a moss season that stretches from fall through spring most years, and you've got a wall assembly that's rarely given a real chance to dry out. Siding repair out here isn't just about matching a color or swapping a cracked board — it's about understanding why that board cracked or rotted in the first place, and fixing that cause so the same spot doesn't fail again in two years.
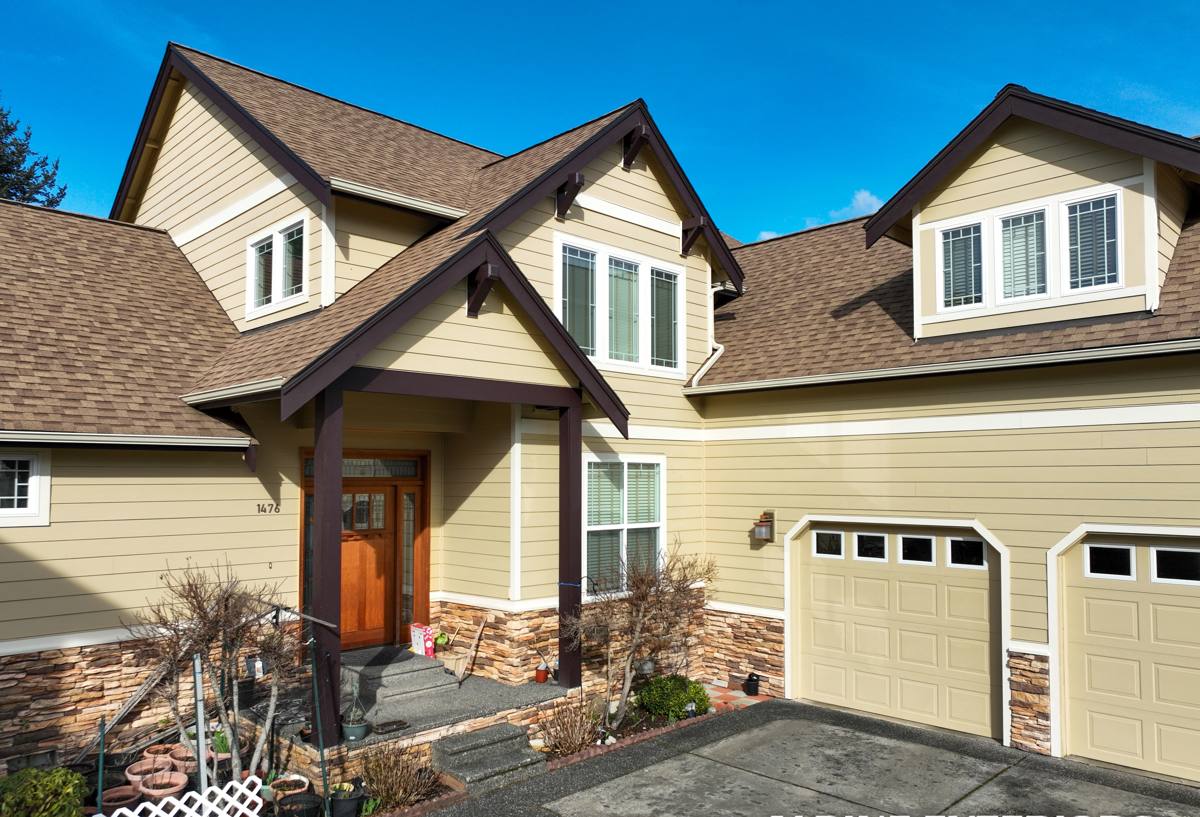
What This Climate Does to Siding Over Time
Moss, Algae, and Trapped Moisture
Shaded walls, north-facing elevations, and anywhere siding sits close to landscaping or a fence line tend to stay damp longer here than the label on most siding products assumes. Moss and algae take hold in the grain of wood-based products and in caulked joints, and once established they hold water against the surface far longer than plain rain does. That constant dampness is what actually causes rot and delamination — not the rain itself, but rain that never gets a chance to leave.
Wind-Driven Rain and Failed Seams
Rain that comes in sideways behaves differently than rain that falls straight down. It gets pushed up under laps, into nail penetrations, and behind trim that was caulked instead of properly flashed. A seam that would be fine in a calmer climate becomes a chronic leak point here, and by the time a stain shows up on an interior wall, the sheathing behind the siding has often been wet for a long time.
Freeze-Thaw and Outflow Wind Stress
When a Sumas Gap outflow event follows a wet stretch, any moisture that soaked into a seam or a piece of untreated wood trim can freeze, expand, and crack the material or pop a fastener. Over several winters that cycle turns small, invisible problems into visible splits, popped nails, and warped boards.
Signs Your Nooksack or Sumas Home's Siding Needs Attention
Most siding problems out here start small and stay hidden for a while. Walk your exterior a couple of times a year and look for:
- Soft spots when you press on siding near the bottom courses, around windows, or below roof valleys
- Green or black staining that comes back within a few weeks of cleaning it off
- Boards that have visibly cupped, bowed, or separated at the seams
- Paint or factory finish that's peeling, chalking heavily, or bubbling
- Cracks at butt joints, corners, or anywhere siding meets a window or door trim
- Nail heads that have backed out or left rust streaks
- Interior signs — a musty smell, a soft spot on a wall, or a stain near an exterior wall
- Gaps where caulking has shrunk, cracked, or pulled away from the siding
Any one of these on its own might be minor. Several together, especially on a wall that takes the brunt of the weather, usually mean water has been getting behind the siding for a while.
What a Correct Repair Actually Involves
A repair that only replaces the damaged board and re-caulks the joint is a cosmetic fix, not a real one. If the reason that board failed — bad flashing, a missing weep path, siding installed too close to grade, trim that traps water — isn't corrected, the new piece fails on the same schedule as the old one. A repair done right in this climate means:
- Pulling back enough surrounding material to see the housewrap, flashing, and sheathing condition, not just the surface
- Repairing or replacing any compromised weather-resistive barrier and flashing before new siding goes back on
- Checking clearance from grade, decks, and roof lines, since standing water and splashback are common causes of failure at the bottom courses
- Using fasteners and joint details that shed wind-driven rain instead of relying on caulk alone
- Matching the replacement material's profile, reveal, and finish closely enough that the repair doesn't stand out
That last point is where painted wood products and some fiber cement competitors get difficult. A field-touched-up patch on cedar or primed wood trim almost never matches weathered paint exactly, and repairs on some fiber cement lines can be tricky to color-match once a factory finish has been in the sun and rain for several years. It's one more reason we standardized on a single, well-documented product system rather than juggling touch-up paint formulas for half a dozen different siding brands.
Repair or Replace? How We Make the Call
Not every damaged wall needs a full re-side, and not every repair is worth doing piecemeal. We look at the extent of the damage, the age and condition of the rest of the siding, and what's actually happening behind the wall before recommending either path.
| Factor | Points Toward Repair | Points Toward Replacement |
|---|---|---|
| Extent of damage | Isolated to one wall, corner, or a handful of boards | Recurring problems on multiple elevations |
| Age of existing siding | Relatively young, still under warranty, finish intact elsewhere | Original siding is decades old or already at end of service life |
| Sheathing condition | Dry, sound sheathing found once siding is opened up | Soft, delaminated, or rotted sheathing found behind damaged areas |
| Material match | Matching product or color is realistically available | Product discontinued or finish too weathered to blend |
| Underlying cause | A localized flashing or clearance fix resolves it | A systemic problem (bad original install, wrong product for the exposure) |
Repairs that address one wall section might run a few hundred dollars; repairs that involve removing multiple courses to reach damaged sheathing and flashing run higher. Whole-wall or full re-side pricing depends on square footage, trim complexity, and what's found once the old siding comes off — anyone quoting a firm number before opening a wall up is guessing.
Why We Repair — and Replace — Only With James Hardie
We install and repair with James Hardie fiber cement exclusively. We don't work with LP SmartSide, vinyl, Cemplank, Allura, primed spruce, or cedar, and that's not a marketing line — it's a standard we hold because of what we've seen this climate do to wall assemblies over years of working in it.
Fiber cement doesn't absorb water and swell the way engineered wood or solid wood trim can, which matters directly in a place where wet seasons run long. It's non-combustible, which counts for something during dry-season wildfire smoke and ember exposure even out here in wetter Whatcom County. And Hardie's ColorPlus factory finish is baked on and warrantied against fading and peeling in a way that field-applied paint on wood siding simply isn't — which makes patch repairs down the road far more predictable to match. When we do a repair on an existing Hardie installation, we're working within one well-understood product system with a manufacturer warranty behind it, not trying to reverse-engineer a stain match or guess how a different manufacturer's product will move with the seasons.
That consistency is also why, when a repair reveals that a wall's real problem is the original siding material rather than the installation, we'll say so plainly instead of just patching around it.
Our Siding Repair Process for Nooksack and Sumas Homes
- On-site inspection. We look at the damaged area and the surrounding siding, check for moisture with a meter where needed, and get a sense of how far the problem extends.
- Open it up. We pull back enough siding to see the housewrap, flashing, and sheathing underneath — this is the step that tells us whether we're looking at a simple patch or something bigger.
- Fix the cause. Damaged sheathing gets replaced, flashing gets corrected, and any clearance or drainage issue gets addressed before new siding goes back up.
- Match and install. We use James Hardie product matched to your existing siding's profile and color as closely as available, installed to manufacturer spec for fastening, gapping, and clearance.
- Finish and clean up. Trim, caulking at appropriate joints only (not as a substitute for flashing), and a walk-through so you know exactly what was found and fixed.
Why Hiring a Crew That Already Works This Area Matters
A contractor who mostly works drier, more sheltered parts of the county can miss things that are second nature out here — where outflow wind actually hits a wall hardest, why a north wall near the tree line never quite dries, or why a repair on a Sumas Prairie property needs different clearance thinking than a repair in town. Knowing the local weather pattern isn't trivia; it changes where you look for hidden damage and what detail you correct so the repair actually lasts. It also means straight answers about permitting and code requirements that apply in Whatcom County, without guesswork borrowed from a different jurisdiction.
Just as important is honesty about scope. A repair-only crew with an incentive to sell a full re-side will lean that way; a crew with an incentive to do the fastest possible patch will under-scope a job that actually needs sheathing replaced. We'd rather tell you a small repair is genuinely all you need than talk you into more, and we'd rather tell you up front that a patch won't hold if the sheathing behind it is already compromised.
Keeping Repaired Siding From Failing Again
Once a repair is done right, a little seasonal attention keeps it that way:
- Rinse moss and algae off siding before it builds up a thick mat, rather than after it's established
- Keep gutters clear so overflow doesn't run down the wall face during heavy rain
- Trim back vegetation and maintain a few inches of clearance between siding and grade, mulch, or planting beds
- Recheck caulking at trim and penetrations each year, since it's the first thing to fail after a repair
- Watch the same trouble spots the following winter, since a proper fix should show no recurrence through a full wet-to-freeze cycle
If you're seeing soft spots, staining, or cracked siding on a home in Nooksack or Sumas, we're glad to take a look and tell you plainly whether you're looking at a straightforward repair or something more. Reach out for a free, no-pressure estimate — there's a short form below to get started.